Commercial Metal Building Structures
Aloha Construction in Panama City Beach, FL admits there are numerous steps involved in erecting your metal building. The first and most important decision should be what purpose this commercial metal building project will be used for. The property owner must be able to either relate their ideas to one of our trained personnel for Aloha Construction to put together a structural and architectural design. While the process can be seemingly tedious and confusing at times, completing each one of these steps is essential to the assembly of your metal building. Before you decide to purchase a metal building, you should be aware of the steps involved to erecting it.
Step 1: Site Preparation
Undeveloped land is often following its natural contour. Building on a steep slope or on an uneven surface can create serious problems for the stability of your structure. Land grading involves heavy equipment and a precise understanding of how to engineer a site to prevent erosion and runoff that could threaten your new installation—or surrounding buildings and landscape features. The proper drainage and a level space for construction sets up your installation to progress smoothly.
Step 2: The Foundation
The foundation is one of the most important elements of erecting your commercial metal building. You will need to view the engineered instructions to find out where your anchor bolts will be placed in the foundation. You will need footer engineering to insure your concrete foundation meets all required Florida building codes.
Step 3: The Frame
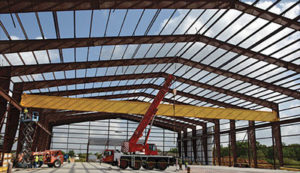
The first part of the framing process begins with the I-Beam columns and the rafters. As these buildings are “pre-engineered,” all the pieces will be pre-cut, punched, and welded for you. There is special situations that do involve retro fitted custom millworks on site. These beams are going to be the heaviest and most essential pieces to the construction of your metal building.
Step 4: Girts, Purlins, and Framed Openings
Once you get the main frameworks up, you can then start to add the girts, purlins, and framed openings that give more support to the walls and roof. We always need to keep in mind that there are many different types of doors and windows available. There should be a detailed window and door size chart accessible at all times to assure opening are correctly framed out.
Step 5: Roof and Walls
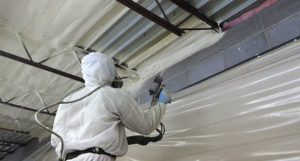
 By this point, most of the framing should be completed. From here you can start to focus on the insulation, walls, and roof sheeting. Simply screw the sheeting into the frame using the fasteners. After the walls are done, you can focus on the roof panels, where you can also remember to include the weather stripping.
Step 6: Aesthetics
The last part to erecting your metal building is adding all the bells and whistles. This would include any of the trim and accessories that you purchased for your metal building. The trim will not only allow your building to look finished, but it will also help to keep the building free of leaks. Lastly, you will add any doors, windows, and vents so that your building is complete.
Step 7: Interior Finishing
If you prefer a more traditional office, feel you probably want to use drywall to enclose your interior spaces. Once your interior walls are properly framed, you will want to adhere to the same types of construction principles as with any other structure, ensuring that all electrical wiring, plumbing, fire protection devices, lighting plans, etc. are wired, installed, and inspected before closing the walls. This can be as detailed as the property owner desires.
Contact us today to discuss your project and let us show you what we’ve done for so many other commercial projects in the Florida Panhandle.